How to Change Color in Photoshop?
What kinds of colors are using in Photoshop? Are you aware of how to change them out? If you’re not as familiar with this aspect of the application, read on to learn all about how you can change colors in Photoshop.
Working in Adobe Photoshop comes with its own set of challenges as a raster graphics program. Namely, it doesn’t have much of the same functionality as vector-based art applications. It’s why we use Photoshop more for detailed art and less so Illustrator.
Vector programs are easier to manage in terms of creating shapes and altering color. Want to make your shape more pointy? Move the vector points. Want to change that triangle from red to green? Simply magic erases the inner color and uses a paint bucket to fill in the shape.
Of course, making such changes in Photoshop requires a bit of reworking. Anybody who has used the paint bucket in Photoshop is aware that it’s not so simple as clicking and filling. This aspect is especially true if you’re trying to change the color of an object.
Rasterized art contains far more information than vector artwork. This means that most objects within the application won’t just recognize one color but multiple shades and variations. If we were to change the color of an object in a photo, we need to get a bit more creative to make the change effective.
Let’s take a look at a photograph and select a specific object from that photograph that needs a color change. It’s not impossible to do even within all the information the image contains.
Steps for Changing Object Color in Photoshop
Here are the step-by-step instructions for changing the color of an object in Photoshop:
Step 1: Select An Object
First, we need to section off the object from the rest of the photograph, so we’re focusing on the color change. It’s easy enough to make a general color change to an entire image, given the abundance of adjustment layers and the powerful sliders of the Camera RAW filter.
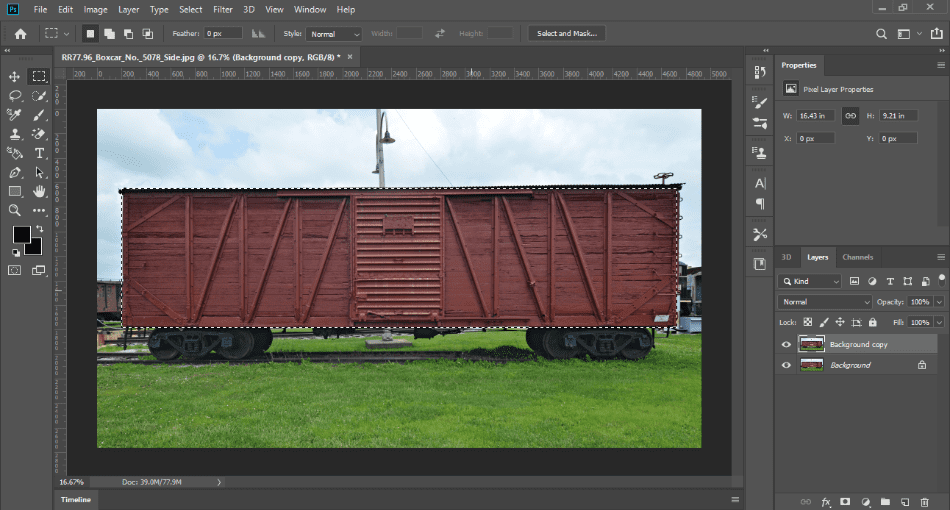
There are a few ways that we can accomplish this. If your object is among a solid color, it’s possible to get away with duplicating the image layer and then magic-erasing the rest of the background. That’s a decent way to section off the object if your image allows for it.
Most photographs, however, won’t provide such luck. For this reason, we’re going to select the object using the selection tools. You can choose any of the selection tools, such as the rectangle or lasso. If you’re not handy enough to draw around the object, it’s okay. A rectangle around most objects will suffice for now.
Step 2: Create a Layer Group and Mask
With our object now selected, we too now create a layer group for our selection. Look in your Layers panel and click Create New Group, creating the layer group that we’ll be using for this object.
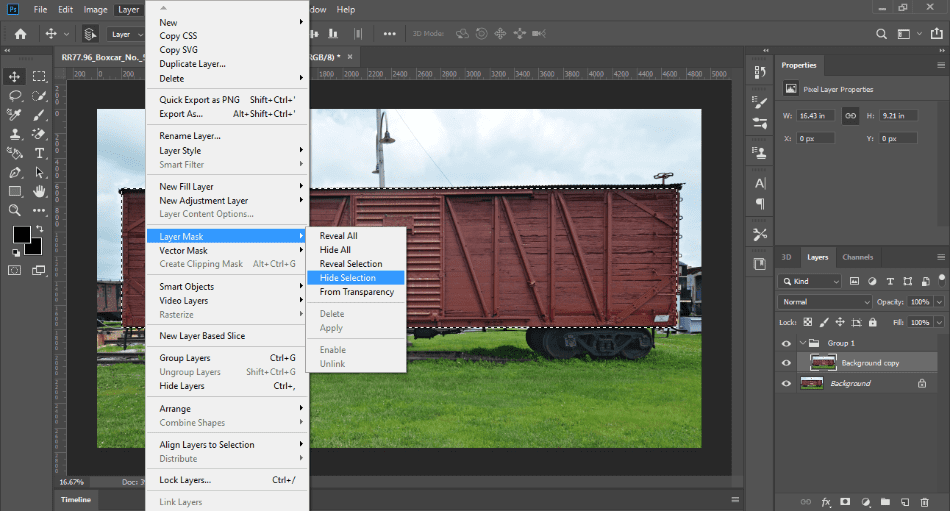
For this next part, make sure that your selection is still active so that you can see the moving dotted lines around the object. In your Layers panel, click on the Layer Mask and select Hide Selection. This will create a mask in the shape of the selected object and will be used to affect multiple layers.
Step 3: Add The New Color
Now that we have our selection, it’s layer group and its mask layer. All the pieces are now in place to start changing the color of the object. In the Layers panel, we’re going to click either Create New Fill or Adjustment Layer. We will then select Solid Color.
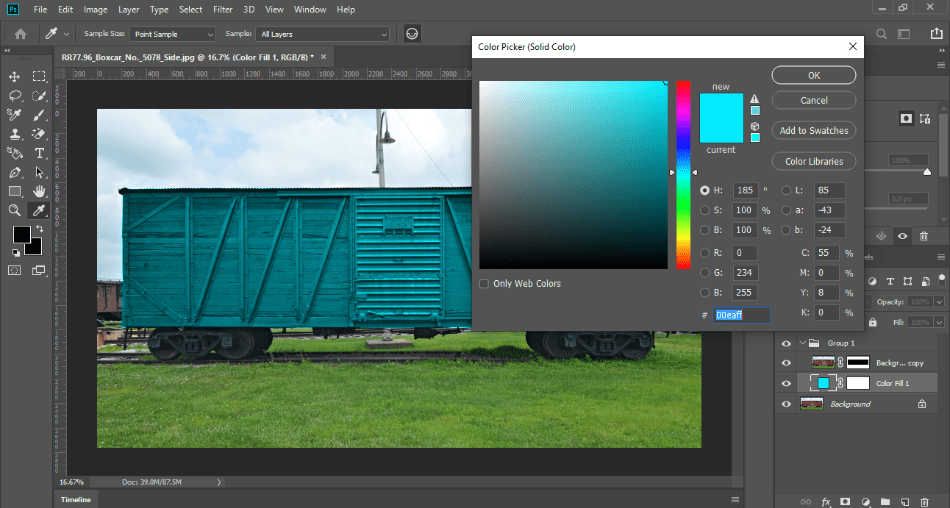
This will now add a Color fill layer housed within your layer group. Drag it below your current mask layer, and currently, the color fill will be limited to the object area, not affecting the rest of the images or the layers. So select the color you want your object to change. Just like that, your object has a different color.
But it doesn’t quite look right, does it? This is because we need to blend the color. With the Color fill layer selected, click the Blending Modes dropdown menu. Select the Color blending mode, and your object should now look closer to the ended color.
You can experiment with different blending modes to see what works best, but the Color blending mode will work best. This mode will give the new color hue and saturation to the layer but also maintain the brightness.
Step 4: Adjust The Color
So we have the fundamental aspects down of changing the color of an object. But there may be some other tweaks you want to make to this color shift. Maybe the brightness doesn’t look quite right, and you want to alter this component.
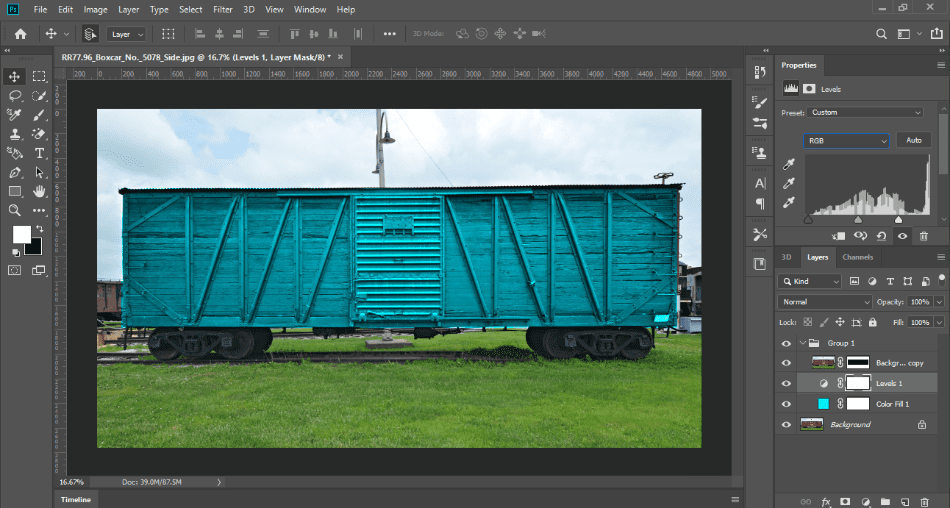
In the Layers panel, find and click the Create New Adjustment Layer button. From the options available, choose Levels. This will add an adjustment layer for altering the levels of brightness and contrast.
With this new Levels layer selected, drag it down below the Color fill layer in the group. With the Levels adjustment layer in place, you can now start making changes to the levels using the Input Levels sliders in the Properties panel.
When adjusting these sliders, you’ll notice a change in the brightness of the color. The white slider can be drug to the left to increase brightness. The gray slider can go to the left to shift the contrast. These changes will bring more texture and shading with the alterations made in the brightness.
Several other blending modes and adjustment layers you can try out to find just the right mixture of color. The steps outlined here are just a few of the fundamental aspects of changing color. Try out some different modes and filters for yourself to see what works best.